Using RTD DB
This guide explains how to run RTD DB, configure the connection, and begin collecting data in your database.
Initial Setup
Before using RTD DB, review the following resources:
- Concept – Understand how RTD DB operates and the underlying mechanisms.
- Configuring Tables – Define the data mapping for your tables.
Next, proceed to:
- Database Templates – Access ready-to-use SQL scripts for creating and configuring data tables.
Once prepared, follow these steps:
- Start RTD DB.
- Set your connection string using Connection Manager from the File menu.
- Click the Start button to initiate data collection.
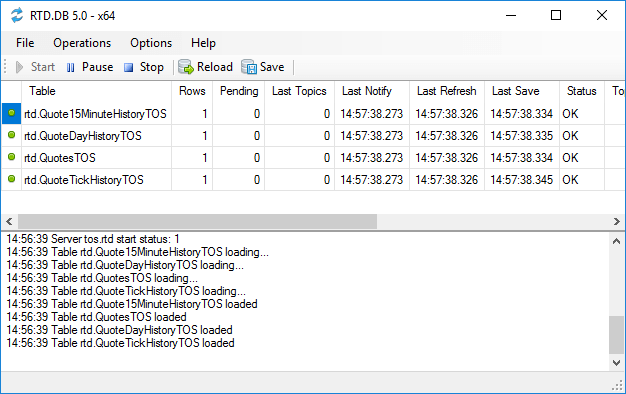
Upon successful setup, the main interface will appear as shown below:

In this example, four tables are updated with incoming real-time data from the RTD server, with values written to your database in real time.
For a detailed description of the UI, refer to User Interface.
By default, RTD DB minimizes to the system tray. Use the tray icon to restore the window.
Next Steps
- Verify the loaded data in your database.
- Add more tickers to your input tables as needed.
- For more than 100 tickers, refer to Cycling Tickers.
- Add tables with different time frames using database templates.
- Learn more about configuration tables.
- Explore built-in functions to customize your logic.
- If you encounter issues, consult Troubleshooting or contact Support.
Contents